![]() Search tips
Search tips
- To search in a subset of topics, select
 in the search field and select a filter.
 - To search for a specific word or phrase, add quotation marks around it (example: "budget column") in the search field.
- To remove highlighting on the search terms in a topic, select
 .
. - To search within a topic, select
 , press Ctrl+F, and enter the search term.
ProjectSight Mobile
Take ProjectSight's cloud-based construction project management software with you in the field on your phone or tablet.


You can use daily reports to track the equipment, daily activity of the crews, and weather conditions on the job site.
If you don't have the feature permission for future daily reports, you can only create daily reports for today's date, based on the timezone in your profile, or earlier.
In the daily report:
- You note that heavy rain on the job site caused delays for the scheduled concrete pours in Zones 1A to 1D.
- You log 40 hours of work for the day shift crew.
- In the project menu, select Records > Daily Reports.
- If the Search panel is closed, select
 (Search) on the navigation toolbar.
 - Set the filters.
- The search terms are applied to text fields, including lookup lists, company and contact fields, and custom fields, in the daily reports that you have access to.
- To find the daily report for a specific date, select the date in the calendar.
- To find daily reports with labor, weather, and comment cards that were added by a specific contact or company, use the Contributing Contacts or Contributing Companies option.
- The Location filter displays the locations that are used in the labor and equipment cards.
- If the Information panel isn't open, select
 (Information) on the navigation toolbar.
 - Select a date in the calendar, which indicates the dates that have a daily report.
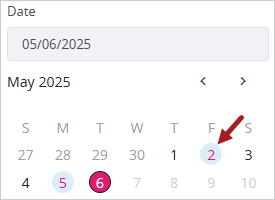
If you select a date without a daily report, a new report is created.
If you opened the first report from the Daily Reports module, you can select ![]() (Previous) and
(Previous) and ![]() (Next) to navigate between existing reports. These buttons aren't available if you opened today's report from the Daily Reports tile.
(Next) to navigate between existing reports. These buttons aren't available if you opened today's report from the Daily Reports tile.
You can create only one daily report for each day. If you select a day that already has one, that daily report is opened.
If daily reports are configured to use workflow templates, the default template (if specified) or the first template in the list is used to create a new daily report.
- On the navigation toolbar, select Add.
- Select the date.
- In the Information panel, enter the daily report details.
- Enter the total rainfall and snowfall for the day.
- Enter the total for lost productivity, and then select the unit of measurement from the UOM list.
- To add an assignment, select Add in the Assigned to section, select the name, and then set a due date.
- To add a courtesy copy, select Add in the Courtesy copies section, and then select the name.
- In the Notes section, enter a comment and link items to it.
- Add the equipment, labor and weather details.
- To link an item to the daily report, select
 (Links), select
  (Add), and then select the item type.
 - To save the changes and keep the daily report open, select
 (Save).
—Or—
To save the changes and close the daily report, select ![]() (Save).
(Save).
You can filter information by company and location in the Daily reports view and within a daily report. The filters are applied to the following sections:
- Equipment
- The Daily reports view only displays daily reports with equipment entries for the selected companies and locations.
- A daily report only displays entries for the selected companies and locations in the Equipment section.
- Labor
- The Daily reports view only displays daily reports with labor entries for the selected companies and locations.
- A daily report only displays entries for the selected companies and locations in the Labor section.
- Notes
- In the Daily reports view, the company filter is not applied to the Notes section.
- A daily report only displays comments created by someone from the selected companies in the Notes section.
- The company and location filters in the Daily reports view and the company and location filters in the daily report are not affected by each other.
- The company filter is displayed if you have the View permission for Equipment or Labor and if there is data in the Equipment, Labor, or Notes section.
- The location filter is displayed if you have the View permission for Labor or Equipment and if there is data in the Equipment or Labor section.
- In daily reports, the company and location filters are applied together so that only entries that match both filters are displayed.
- If you add or edit an entry in a daily report that doesn't fit the current filter, the filter is cleared in the daily report.
- If you navigate to the next or previous daily report, the filters are cleared.
- In the Search panel of the Daily Reports view, select Company or Location.
- Select the checkbox for one or more companies or locations.
- At the top of the daily report, select the By company or By location list.
- To search for a company or location, start typing in the field at the top of the list.
- Select one or more companies or locations.
- Select Done.
To see the full name, hover over the company or location.
The company filter is cleared when you navigate to another daily report from the calendar in the Information panel or by the ![]() (Previous) or
(Previous) or ![]() (Next) buttons.
(Next) buttons.
- In the Search panel of the Daily reports view, select Company or Location and then clear the checkbox for the company or location.
- In the By company or By location list.
- At the top-left of the Daily report tab.
—Or—
In the By company or By location list of the daily report, clear the checkbox for the company or location.
To clear all the companies or locations in the By company or By location list, you can select Reset:
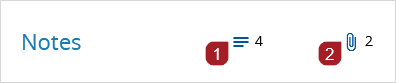
In the Notes section of the daily report, you can add comments and link items to the daily report. The summary displays:
- The number of comments
- The number of linked items
- On the right side of the section, select
 (Expand).
- On the right side of the section, select
 (Add).
 - In the field, enter your comment.
- To upload and link a file, select
 (Upload File), and then drag or browse to the file.
 - To link to a drawing, select
 (Drawing), and then select a drawing.
 - To link to other types of items, select
 (Add Links), and then select the item type and item.
 - Select
 (Send).
The linked items are also displayed in the Links panel.
- On the comment card, select
 (More) > Edit.
 - Edit the comment.
- To save the changes, select (Send).
—Or—
To cancel the changes, select refresh (Cancel).
- On the comment card, select (More) > Delete.
- In the confirmation dialog, select OK.
- You can only delete your own comments.
- Any linked items remain in the Notes section and in the Links panel.